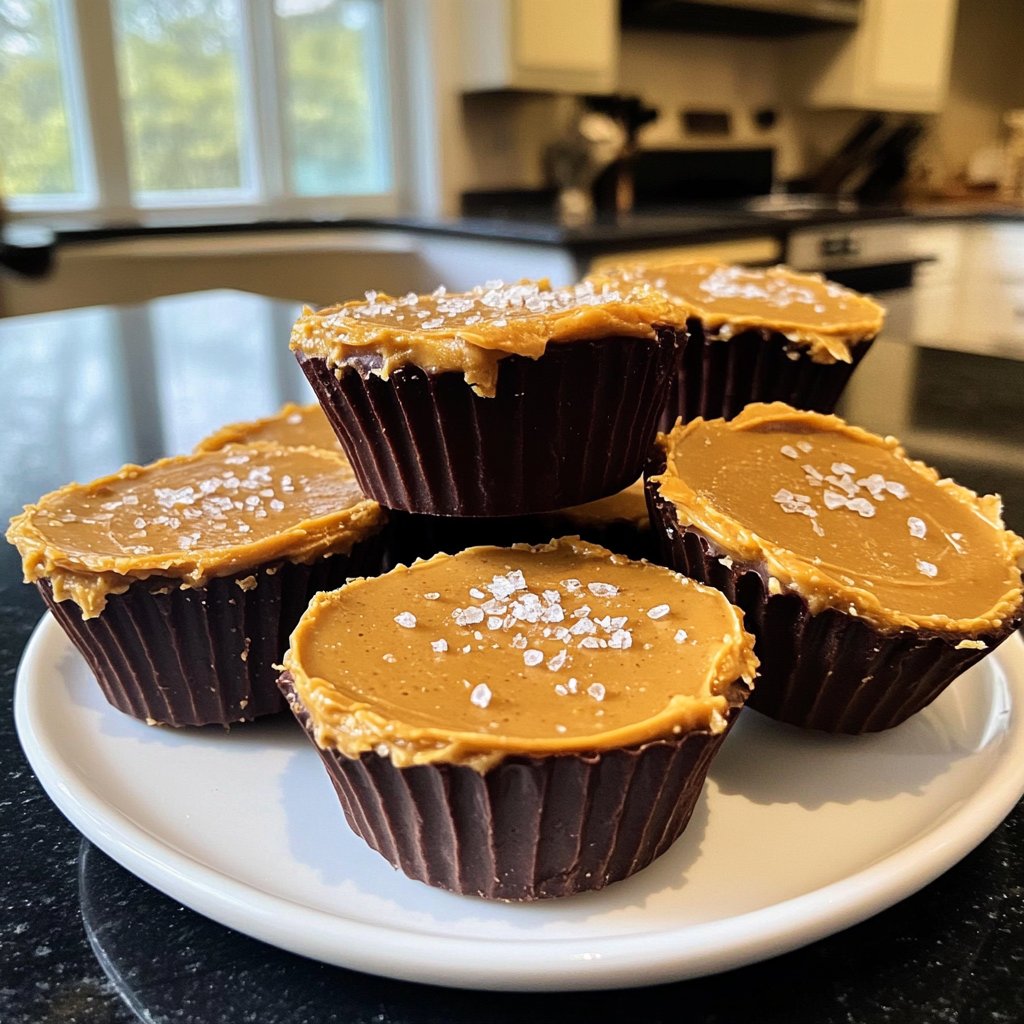
Homemade Peanut Butter Cups with Sea Salt
Highlighted under: Dessert Delights
I absolutely love making my own peanut butter cups at home! There’s something incredibly satisfying about blending rich, creamy peanut butter with silky chocolate and a hint of sea salt. The combination is just perfect, and the process is surprisingly easy. You don’t need any fancy equipment or ingredients, just the basics you probably already have in your kitchen. Trust me, once you try these homemade treats, you’ll never want to go back to store-bought again. They’re pure bliss in every bite!
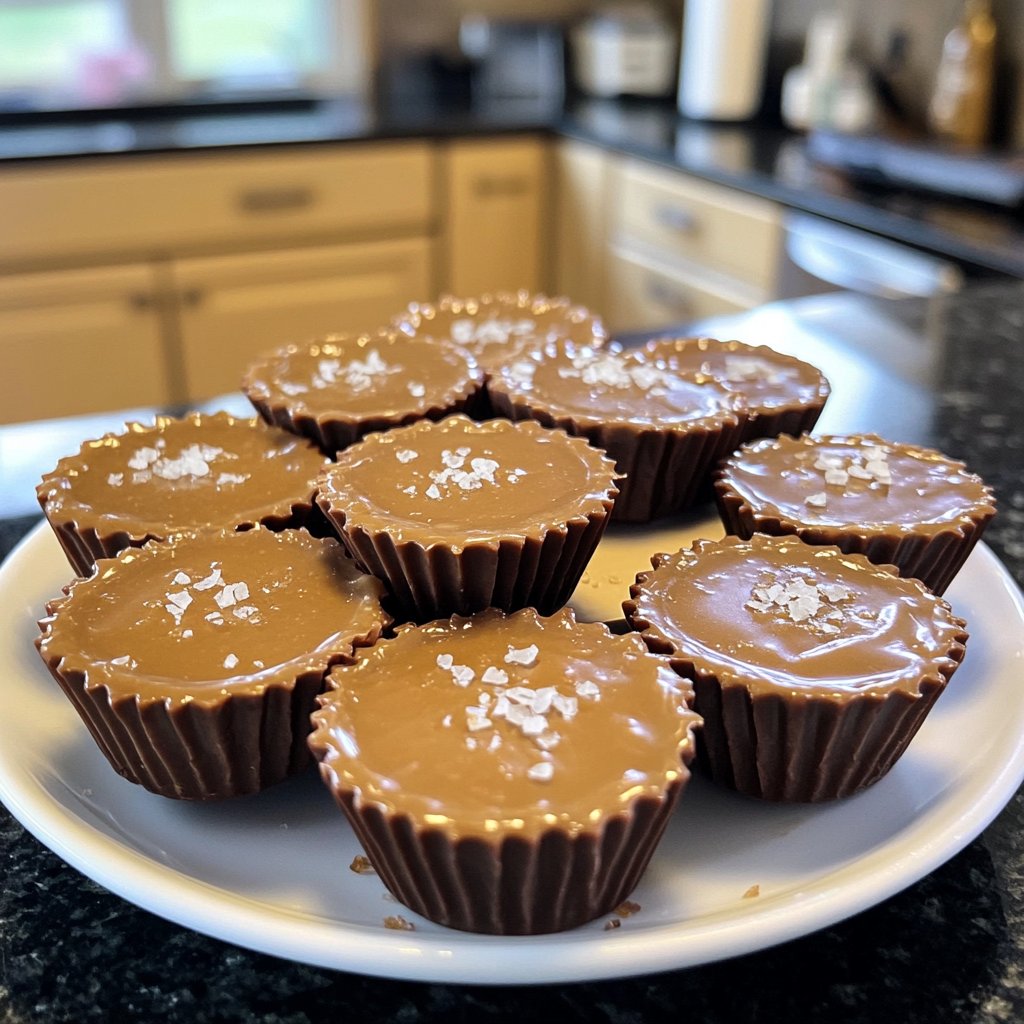
I've spent countless weekends experimenting with different recipes, and these homemade peanut butter cups have become a true favorite in my household. The key to their success is using high-quality chocolate and balancing the sweetness of the peanut butter with a touch of sea salt on top. This elevates the flavor profile dramatically, making each bite an unforgettable experience.
One of the best tips I can share from my experience is to let the chocolate set completely before adding the peanut butter layer. This creates a delightful texture difference that enhances the overall enjoyment. Trust me, the wait is worth it!
Why You'll Love This Recipe
- Decadent chocolate with a hint of sea salt for an irresistible flavor
- Rich, creamy peanut butter filling that’s perfectly balanced
- Simple ingredients you likely already have at home
Understanding the Role of Ingredients
The quality of the chocolate you use is paramount in achieving the perfect homemade peanut butter cups. Semi-sweet chocolate chips provide a nice balance of sweetness, while milk chocolate adds creaminess and depth. Opt for high-quality brands as this will significantly enhance the overall flavor. Cheaper chocolate can lead to a grainy texture, ruining the silky mouthfeel you’re aiming for.
Peanut butter is another hero in this recipe. Using a creamy, natural peanut butter will yield the best results, as it blends smoothly with the powdered sugar and salt. If you're looking for a healthier twist, almond butter can work as a delightful substitute, giving a unique flavor profile without sacrificing creaminess. Just ensure it's the drippy variety for easy mixing.
Technique Tips for Perfect Layers
When melting chocolate, be vigilant about your timing and temperature. Microwaving in short bursts ensures that the chocolate heats evenly without seizing up. Stirring after each interval is crucial; it aids in the melting process and provides a smooth and glossy finish. If you notice the chocolate becoming too thick, a teaspoon of coconut oil can help restore a more fluid consistency.
Spreading the melted chocolate in your muffin liners effectively creates a sturdy base. Aim for about a 1/8 inch thickness for a well-balanced ratio of chocolate to peanut butter. If your base isn’t thick enough, you might end up with a top-heavy cup that could collapse under its weight. Make sure to chill your chocolate bottom layer for a few minutes before adding the peanut butter filling for optimal texture.
Ingredients
For the Cups
- 1 cup semi-sweet chocolate chips
- 1 cup milk chocolate chips
- 1 cup creamy peanut butter
- 1/2 cup powdered sugar
- 1/2 teaspoon sea salt
Get ready to indulge in these delicious treats!
Instructions
Melt the Chocolate
In a microwave-safe bowl, combine the semi-sweet and milk chocolate chips. Melt in the microwave in 30-second increments, stirring until smooth and fully melted.
Prepare the Cup Liners
Line a muffin tin with paper liners. Using a spoon, fill the bottom of each liner with a layer of melted chocolate, about 1 tablespoon. Use the back of the spoon to ensure it spreads evenly.
Make the Peanut Butter Filling
In a separate bowl, mix together the peanut butter, powdered sugar, and sea salt until smooth and creamy. Spoon approximately 1 tablespoon of the mixture onto the chocolate layer in each liner.
Top with Chocolate
Pour more melted chocolate on top of the peanut butter layer to completely cover it. Tap the muffin tin gently on the countertop to smooth out the chocolate.
Chill and Serve
Place the muffin tin in the refrigerator for about 15-20 minutes, or until the chocolate is set. Remove from the liners and enjoy!
Dig in and enjoy your homemade peanut butter cups!
Pro Tips
- For an extra crunch, try adding chopped peanuts to the peanut butter filling. You can also experiment with different types of chocolate, such as dark chocolate for a richer flavor.
Serving and Storage Suggestions
These homemade peanut butter cups can be stored in an airtight container in the refrigerator for up to two weeks. If you’re looking to prepare them ahead of time, they freeze beautifully. Just layer them in a freezer-safe container separating each layer with parchment paper to avoid sticking. Thaw them in the fridge overnight before serving to retain their texture.
To serve, you can elevate the experience by drizzling melted chocolate or caramel over the top. A sprinkle of additional sea salt right before serving can enhance the flavors, making each bite a delicious contrast of sweet and salty. Pair these cups with a tall glass of cold milk or a cup of coffee for a delightful treat.
Creative Variations
Feel free to switch things up by adding crushed nuts or a sprinkle of your favorite spices to the peanut butter mixture for added texture and flavor. Sea salt can be swapped for flaky smoked salt for a unique twist that adds depth to the sweetness. For a richer chocolate experience, consider using dark chocolate instead of milk chocolate.
If you're entertaining, think about making a variety pack. Create different flavors by incorporating ingredients like shredded coconut, caramel, or even a hint of espresso powder into the peanut butter filling. This not only adds visual appeal but allows you to cater to different taste preferences, making your treats a hit at gatherings.
Questions About Recipes
→ Can I use natural peanut butter?
While natural peanut butter can be used, it may make the filling a bit thinner. I recommend using creamy peanut butter for the best texture.
→ How long do these last?
Homemade peanut butter cups can last up to a week in an airtight container in the refrigerator.
→ Can I freeze these?
Yes! They freeze well. Just wrap them individually and place them in a zip-top bag. Thaw in the refrigerator when you’re ready to enjoy them.
→ What type of chocolate should I use?
I recommend using a mix of semi-sweet and milk chocolate for a balanced flavor, but feel free to use dark chocolate if you prefer a richer taste.
Homemade Peanut Butter Cups with Sea Salt
Created by: Brianna Tate
Recipe Type: Dessert Delights
Skill Level: Beginner
Final Quantity: 12 cups
What You'll Need
For the Cups
- 1 cup semi-sweet chocolate chips
- 1 cup milk chocolate chips
- 1 cup creamy peanut butter
- 1/2 cup powdered sugar
- 1/2 teaspoon sea salt
How-To Steps
In a microwave-safe bowl, combine the semi-sweet and milk chocolate chips. Melt in the microwave in 30-second increments, stirring until smooth and fully melted.
Line a muffin tin with paper liners. Using a spoon, fill the bottom of each liner with a layer of melted chocolate, about 1 tablespoon. Use the back of the spoon to ensure it spreads evenly.
In a separate bowl, mix together the peanut butter, powdered sugar, and sea salt until smooth and creamy. Spoon approximately 1 tablespoon of the mixture onto the chocolate layer in each liner.
Pour more melted chocolate on top of the peanut butter layer to completely cover it. Tap the muffin tin gently on the countertop to smooth out the chocolate.
Place the muffin tin in the refrigerator for about 15-20 minutes, or until the chocolate is set. Remove from the liners and enjoy!
Extra Tips
- For an extra crunch, try adding chopped peanuts to the peanut butter filling. You can also experiment with different types of chocolate, such as dark chocolate for a richer flavor.
Nutritional Breakdown (Per Serving)
- Calories: 380 kcal
- Total Fat: 26g
- Saturated Fat: 15g
- Cholesterol: 195mg
- Sodium: 85mg
- Total Carbohydrates: 32g
- Dietary Fiber: 3g
- Sugars: 24g
- Protein: 6g