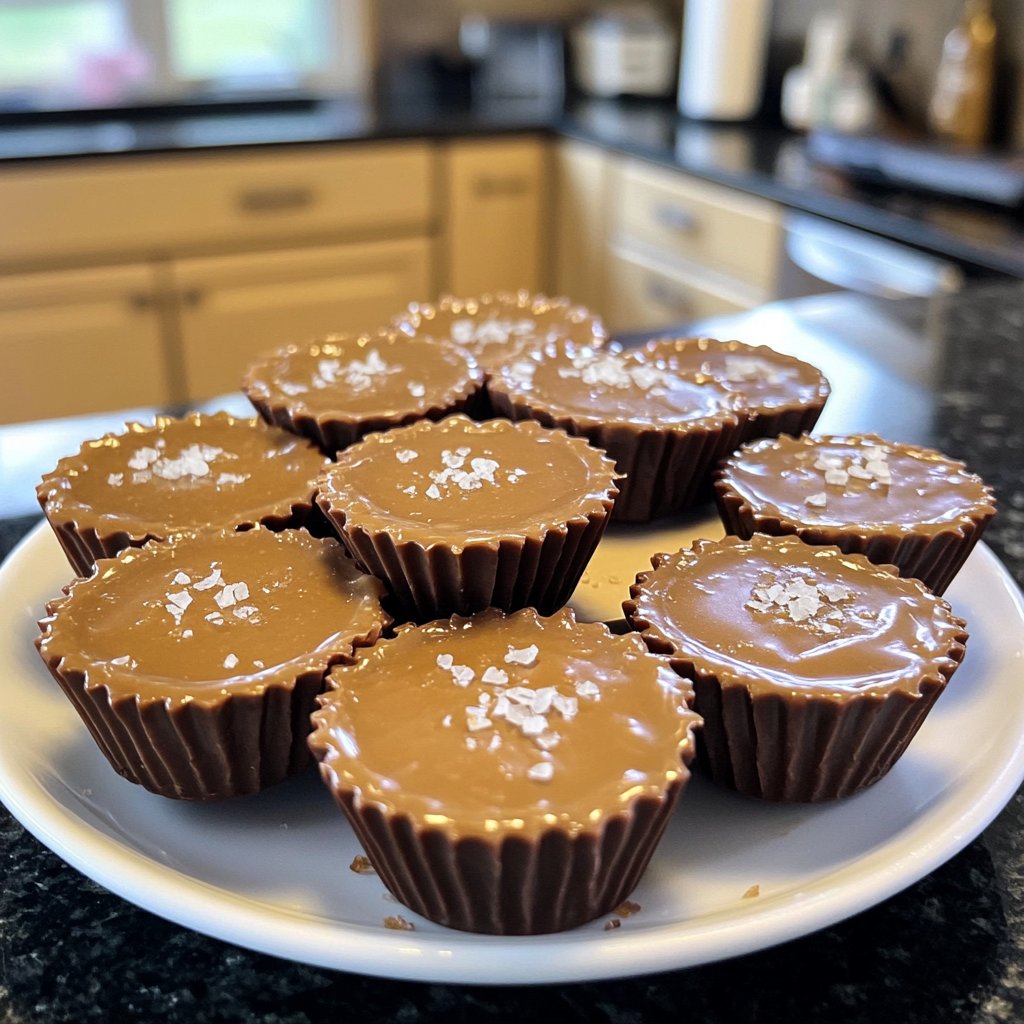
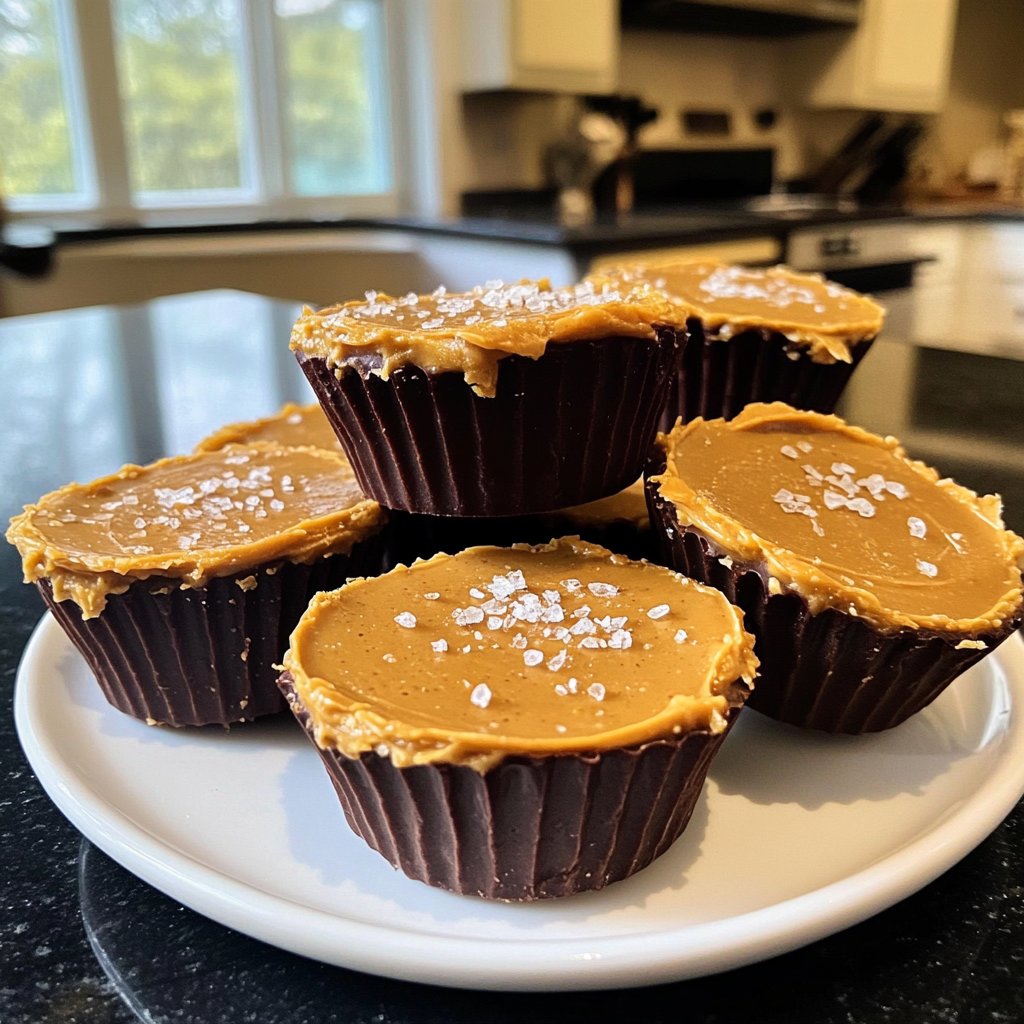
Homemade Peanut Butter Cups with Sea Salt
Highlighted under: Dessert Delights
I love making these Homemade Peanut Butter Cups with Sea Salt for a delightful treat that satisfies my cravings. The combination of creamy peanut butter and rich chocolate, sprinkled with a hint of sea salt, creates the perfect balance of flavors. Every time I indulge, I’m transported back to my childhood, where store-bought versions just never seemed to measure up. Making them at home gives me complete control over the ingredients, and I can adjust the sweetness as I please. It’s a simple recipe that always impresses family and friends!
When I first made these Homemade Peanut Butter Cups with Sea Salt, I was amazed at how straightforward and rewarding the process was. I used high-quality dark chocolate, which added a rich depth that I found incredibly satisfying. The secret is to temper the chocolate properly, ensuring it sets perfectly without bloating. As each cup chilled in the fridge, the anticipation grew!
After a few tries, I found that adding just a touch of sea salt on top enhances the flavor so much more than I ever expected. Every bite is a delightful contrast of sweet and savory, and I love serving them as an elegant dessert!
Why You'll Love These Peanut Butter Cups
- Decadent chocolate that pairs beautifully with creamy peanut butter
- A touch of sea salt elevates the sweetness for a gourmet touch
- Easy to customize with your favorite types of chocolate or nut butter
The Role of Ingredients
Each ingredient in these Homemade Peanut Butter Cups has a crucial role. The dark chocolate provides a deep, rich flavor that pairs perfectly with the creaminess of peanut butter. I recommend using high-quality dark chocolate chips since they melt better and yield a smoother finish. The addition of coconut oil is essential as it not only helps to thin the chocolate for easier pouring but also contributes to a glossy texture that looks professional.
In the filling, creamy peanut butter is essential for that velvety mouthfeel. Opt for a natural peanut butter without added sugar or hydrogenated oils for the healthiest option. The powdered sugar is not only for sweetness but also helps to stabilize the filling, giving it a firm but not overly sweet consistency. The hint of vanilla extract adds depth, while the sea salt enhances all the flavors, bringing forth that gourmet quality.
Perfecting Your Technique
Melting chocolate can be tricky; to prevent clumping or burning, make sure your double boiler isn’t touching boiling water. If you're using a microwave, heat the chocolate in 30-second intervals, stirring in between until it’s just melted and smooth. A common failure is overheating chocolate, which can cause it to seize. If this happens, add a little more coconut oil, stirring until it loosens up again.
When filling the cups, be sure to smooth out the peanut butter layer so that it doesn’t rise above the chocolate coating, which helps to create a cleaner finish. If your fillings are uneven, it can lead to messy cups when you go to unwrap them. For a visually stunning touch, try using a spoon to create a swirl in the top chocolate layer before it sets.
Ingredients
For the Chocolate Coating
- 1 cup dark chocolate chips
- 1 tablespoon coconut oil
For the Filling
- 1 cup creamy peanut butter
- 1/4 cup powdered sugar
- 1/2 teaspoon vanilla extract
- 1/2 teaspoon sea salt
Instructions
Melt the Chocolate
In a double boiler or microwave, melt the dark chocolate chips and coconut oil together until smooth. Stir frequently to avoid burning.
Prepare the Cups
Line a muffin tin with paper liners. Use a spoon to add a spoonful of melted chocolate to the bottom of each liner, spreading it evenly. Place in the freezer for 10 minutes to set.
Mix the Filling
In a mixing bowl, combine the peanut butter, powdered sugar, vanilla extract, and sea salt. Stir until smooth and well combined.
Add the Filling
Remove the chocolate-coated cups from the freezer and scoop a tablespoon of the peanut butter filling into each cup, smoothing it out evenly.
Top with Chocolate
Pour the remaining melted chocolate over the peanut butter layer, ensuring it’s completely covered. Sprinkle a pinch of sea salt on top for added flavor.
Chill and Serve
Return the muffin tin to the freezer for another 15 minutes until the chocolate is fully set. Once firm, remove the cups from the liners and enjoy!
Pro Tips
- For a twist, try using milk chocolate or adding other fillings like crushed nuts or a caramel layer. These cups can also be stored in the freezer for longer freshness!
Storage and Make-Ahead Tips
These Homemade Peanut Butter Cups can be stored in an airtight container in the refrigerator for up to two weeks. If you want to make them ahead of time, they freeze wonderfully; just layer them with parchment paper in an airtight container. They can last up to three months in the freezer. When you're ready to enjoy, let them sit at room temperature for about 10 to 15 minutes for the best texture.
To reduce your prep time, you could make the chocolate coating in advance and keep it melted in a slow cooker on the lowest setting. This way, you're ready to assemble the cups without additional melting time, speeding up the process significantly, especially if making batches for gatherings.
Creative Variations
Feel free to experiment with different types of nut butters! Almond butter or cashew butter can lend unique flavors. For an exciting twist, try adding crushed pretzels or graham cracker crumbs to the peanut butter filling for texture. Additionally, swapping out dark chocolate for white chocolate or milk chocolate can create a sweet variation that appeals to different palates.
You can also experiment by adding spices like cinnamon or chili powder to the filling for a subtle kick. Just a pinch can transform the flavor profile and impress those who think they know peanut butter cups. If you enjoy a crunch, consider sprinkling finely chopped nuts or seeds over the top before the chocolate sets.
Questions About Recipes
→ Can I use milk chocolate instead of dark chocolate?
Absolutely! You can use any chocolate you prefer, though the taste will vary slightly.
→ How long do these peanut butter cups last?
They can last up to two weeks in an airtight container in the refrigerator.
→ Can I make these nut-free?
Yes! Substitute the peanut butter with sunflower seed butter or another nut-free spread.
→ What can I use instead of powdered sugar?
You can use granulated sugar, but the texture might be slightly different. Consider blending it to a powder for best results.
Homemade Peanut Butter Cups with Sea Salt
Created by: Brianna Tate
Recipe Type: Dessert Delights
Skill Level: Intermediate
Final Quantity: 12 cups
What You'll Need
For the Chocolate Coating
- 1 cup dark chocolate chips
- 1 tablespoon coconut oil
For the Filling
- 1 cup creamy peanut butter
- 1/4 cup powdered sugar
- 1/2 teaspoon vanilla extract
- 1/2 teaspoon sea salt
How-To Steps
In a double boiler or microwave, melt the dark chocolate chips and coconut oil together until smooth. Stir frequently to avoid burning.
Line a muffin tin with paper liners. Use a spoon to add a spoonful of melted chocolate to the bottom of each liner, spreading it evenly. Place in the freezer for 10 minutes to set.
In a mixing bowl, combine the peanut butter, powdered sugar, vanilla extract, and sea salt. Stir until smooth and well combined.
Remove the chocolate-coated cups from the freezer and scoop a tablespoon of the peanut butter filling into each cup, smoothing it out evenly.
Pour the remaining melted chocolate over the peanut butter layer, ensuring it’s completely covered. Sprinkle a pinch of sea salt on top for added flavor.
Return the muffin tin to the freezer for another 15 minutes until the chocolate is fully set. Once firm, remove the cups from the liners and enjoy!
Extra Tips
- For a twist, try using milk chocolate or adding other fillings like crushed nuts or a caramel layer. These cups can also be stored in the freezer for longer freshness!
Nutritional Breakdown (Per Serving)
- Calories: 220 kcal
- Total Fat: 16g
- Saturated Fat: 5g
- Cholesterol: 0mg
- Sodium: 95mg
- Total Carbohydrates: 17g
- Dietary Fiber: 1g
- Sugars: 12g
- Protein: 4g